https://github.com/rianhunter/dbxfs
1) 安装依赖软件包
Ubuntu
$ sudo apt install libfuse2
Fedora
$ sudo dnf install fuse
2) 安装 dbxfs
$ pip3 install dbxfs
3) 准备挂载点
$ mkdir ~/my_DropBox
4) 让 dbxfs 从 Dropbox 得到处理文件的权限
$ dbxfs ~/my_DropBox
用浏览器进入以下网址, 会得到一个 code,
将它 copy & paste 回 Terminal.
We need an access token. Perform the following steps:
1. Go to https://www.dropbox.com/oauth2/authorize?response_type=code&client_id=abc
2. Click "Allow" (you may have to log in first)
3. Copy the authorization code.
Enter authorization code (Ctrl-C to quit): ABCDEFGHIJKLMNOPQRSTUVWXYZ
We're all connected. Do you want to save your credentials for future runs? [Y/n] y
Would you like to help us improve dbxfs by providing anonymous error reports? [Y/n] y
Do you want "/home/yomun/DropBox" to be the default mount point? [Y/n] y
5) 在 Startup Applications 加入
Name: Dropbox (dbxfs)
Command: dbxfs /home/username/my_DropBox
Comment: 进入 GNOME, 自动启动
2019年2月17日星期日

2017年8月2日星期三
Fedora KDE - 密码设置
$ su
$ nano /etc/security/pwquality.conf
# 本来预设是要求密码 8 位数, 以下改为 3 位数
minlen = 3
之后可用以下命令改密码
$ sudo passwd username
如果遇到 BAD Password 提示也接着改,
最后会告知是否成功修改
Gnome 密码设置
http://jasonmun.blogspot.my/2017/07/ubuntu.html
$ nano /etc/security/pwquality.conf
# 本来预设是要求密码 8 位数, 以下改为 3 位数
minlen = 3
之后可用以下命令改密码
$ sudo passwd username
如果遇到 BAD Password 提示也接着改,
最后会告知是否成功修改
Gnome 密码设置
http://jasonmun.blogspot.my/2017/07/ubuntu.html
Fedora KDE - 自动 Login 设置
System Settings - Workspace - Startup and Shutdown - Login Screen (SDDM)
- Select Login Theme - Advanced
- Apply
$ su
$ nano /etc/sddm.conf
[Autologin]
Relogin=false
Session=plasma.desktop
User=UserID
[General]
# AutoRelogin=false
# AutoUser=UserName
CursorTheme=Adwaita
HaltCommand=
RebootCommand=
[Theme]
Current=01-breeze-fedora
CursorTheme=Adwaita
[Users]
MaximumUid=65000
MinimumUid=1000
- Select Login Theme - Advanced
- Apply
$ su
$ nano /etc/sddm.conf
[Autologin]
Relogin=false
Session=plasma.desktop
User=UserID
[General]
# AutoRelogin=false
# AutoUser=UserName
CursorTheme=Adwaita
HaltCommand=
RebootCommand=
[Theme]
Current=01-breeze-fedora
CursorTheme=Adwaita
[Users]
MaximumUid=65000
MinimumUid=1000
Fedora KDE - 安装 fcitx + 搜狗拼音
Fedora Gnome 版
https://jasonmun.blogspot.my/2016/05/fedora-ibus-fcitx-sogoupinyin.html
以下是 Fedora KDE 版
(已在 Fedora 26 测试过了)
1) fcitx 安装
$ su root
$ dnf install fcitx kcm-fcitx fcitx-cloudpinyin fcitx-pinyin fcitx-configtool
2) fcitx 设置 (如果没有可跳过)
/etc/sddm.conf 在X11节中设置(默认值是不对的)
SessionCommand=/usr/share/sddm/scripts/Xsession
3) 让系统选择用 fcitx
$ su 用户名
$ imsettings-switch fcitx
4) 搜狗拼音 ubuntu 版下载 (下载到 ~/Downloads)
http://pinyin.sogou.com/linux/?r=pinyin
http://pinyin.sogou.com/linux/download.php?f=linux&bit=64
5) 解压, 需要 deb 里面的 data.tar.xz
$ su 用户名
$ cd ~/Downloads
$ ar vx sogoupinyin_2.1.0.0086_amd64.deb
共有3个文件:
x - debian-binary
x - control.tar.gz
x - data.tar.xz
6) 再解压, 将文件放到系统各处 (安装)
$ su root
$ tar -Jxvf data.tar.xz -C /
$ cp /usr/lib/x86_64-linux-gnu/fcitx/fcitx-sogoupinyin.so /usr/lib64/fcitx/fcitx-sogoupinyin.so
7) 重启系统或运行
$ su 用户名
$ fcitx -r
$ sogou-qimpanel
$ fcitx-configtool # Fcitx 设置界面
https://jasonmun.blogspot.my/2016/05/fedora-ibus-fcitx-sogoupinyin.html
以下是 Fedora KDE 版
(已在 Fedora 26 测试过了)
1) fcitx 安装
$ su root
$ dnf install fcitx kcm-fcitx fcitx-cloudpinyin fcitx-pinyin fcitx-configtool
2) fcitx 设置 (如果没有可跳过)
/etc/sddm.conf 在X11节中设置(默认值是不对的)
SessionCommand=/usr/share/sddm/scripts/Xsession
3) 让系统选择用 fcitx
$ su 用户名
$ imsettings-switch fcitx
4) 搜狗拼音 ubuntu 版下载 (下载到 ~/Downloads)
http://pinyin.sogou.com/linux/?r=pinyin
http://pinyin.sogou.com/linux/download.php?f=linux&bit=64
5) 解压, 需要 deb 里面的 data.tar.xz
$ su 用户名
$ cd ~/Downloads
$ ar vx sogoupinyin_2.1.0.0086_amd64.deb
共有3个文件:
x - debian-binary
x - control.tar.gz
x - data.tar.xz
6) 再解压, 将文件放到系统各处 (安装)
$ su root
$ tar -Jxvf data.tar.xz -C /
$ cp /usr/lib/x86_64-linux-gnu/fcitx/fcitx-sogoupinyin.so /usr/lib64/fcitx/fcitx-sogoupinyin.so
7) 重启系统或运行
$ su 用户名
$ fcitx -r
$ sogou-qimpanel
$ fcitx-configtool # Fcitx 设置界面
2017年3月24日星期五
Fedora - NVIDIA 显卡安装
1. 依赖包
$ su root
$ dnf install kernel-devel kernel-headers
$ dnf install gcc dkms acpid
2. 下载 NVIDIA-Linux-x86_64-375.39.run
http://www.geforce.cn/drivers
3. 给予 NVIDIA-Linux-x86_64-375.39.run 驱动执行权限
$ su username
$ cd ~/Downloads
$ chmod +x NVIDIA-Linux-x86_64-375.39.run
4. 关闭 X-Server
$ su root
$ rm /etc/systemd/system/default.target
$ ln -sf /lib/systemd/system/multi-user.target /etc/systemd/system/default.target
5. 创建 /etc/modprobe.d/disable-nouveau.conf
$ echo 'blacklist nouveau' >> /etc/modprobe.d/disable-nouveau.conf
$ echo 'nouveau modeset=0' >> /etc/modprobe.d/disable-nouveau.conf
6. 修改 /boot/grub2/grub.cfg
$ gedit /boot/grub2/grub.cfg
linux16 /vmlinuz-4.9.14-200.fc25.x86_64+debug root=/dev/mapper/fedora-root ro rd.lvm.lv=fedora/root rd.lvm.lv=fedora/swap rhgb quiet LANG=en_US.UTF-8
改为
linux16 /vmlinuz-4.9.14-200.fc25.x86_64+debug root=/dev/mapper/fedora-root ro rd.lvm.lv=fedora/root rd.lvm.lv=fedora/swap rdblacklist=nouveau rhgb quiet LANG=en_US.UTF-8
7. 重启
$ reboot
8. 登入, 运行 NVIDIA-Linux-x86_64-375.39.run 驱动
$ su username
$ cd ~/Downloads
$ ./NVIDIA-Linux-x86_64-375.39.run
选择 Accept, Yes, Yes.. 等待安装..
9. 修改回预设
$ su root
$ rm /etc/systemd/system/default.target
$ ln -sf /lib/systemd/system/graphical.target /etc/systemd/system/default.target
$ su root
$ dnf install kernel-devel kernel-headers
$ dnf install gcc dkms acpid
2. 下载 NVIDIA-Linux-x86_64-375.39.run
http://www.geforce.cn/drivers
3. 给予 NVIDIA-Linux-x86_64-375.39.run 驱动执行权限
$ su username
$ cd ~/Downloads
$ chmod +x NVIDIA-Linux-x86_64-375.39.run
4. 关闭 X-Server
$ su root
$ rm /etc/systemd/system/default.target
$ ln -sf /lib/systemd/system/multi-user.target /etc/systemd/system/default.target
5. 创建 /etc/modprobe.d/disable-nouveau.conf
$ echo 'blacklist nouveau' >> /etc/modprobe.d/disable-nouveau.conf
$ echo 'nouveau modeset=0' >> /etc/modprobe.d/disable-nouveau.conf
6. 修改 /boot/grub2/grub.cfg
$ gedit /boot/grub2/grub.cfg
linux16 /vmlinuz-4.9.14-200.fc25.x86_64+debug root=/dev/mapper/fedora-root ro rd.lvm.lv=fedora/root rd.lvm.lv=fedora/swap rhgb quiet LANG=en_US.UTF-8
改为
linux16 /vmlinuz-4.9.14-200.fc25.x86_64+debug root=/dev/mapper/fedora-root ro rd.lvm.lv=fedora/root rd.lvm.lv=fedora/swap rdblacklist=nouveau rhgb quiet LANG=en_US.UTF-8
7. 重启
$ reboot
8. 登入, 运行 NVIDIA-Linux-x86_64-375.39.run 驱动
$ su username
$ cd ~/Downloads
$ ./NVIDIA-Linux-x86_64-375.39.run
选择 Accept, Yes, Yes.. 等待安装..
9. 修改回预设
$ su root
$ rm /etc/systemd/system/default.target
$ ln -sf /lib/systemd/system/graphical.target /etc/systemd/system/default.target
Fedora - 速度优化
以下方法不只是在 Fedora 能用,
Ubuntu 也行, 相信其它 Linux 版本也可以用
1. 调整 Swappiness 设置
# 查看系统中的 swappiness (预设为 60)
$ cat /proc/sys/vm/swappiness
# 修改 swappiness 值为 10 (即偏向使用物理内存)
$ sudo sysctl vm.swappiness=10
# 以下也要设置, 不然重启后无效
$ sudo gedit /etc/sysctl.conf
或
$ sudo gedit /etc/sysctl.d/99-sysctl.conf
vm.swappiness=10
重启
2. Preload - 可预读取, 会将经常读取的东西先加载,
开启软件的速度会变快
$ sudo dnf install preload
* OpenSUSE 软件库没有 preload
3. 关闭所有 Effects 特效
$ sudo dnf install compiz ccsm
* OpenSUSE 用 sudo zypper install compiz simple-ccsm
打开 CompizConfig Settings Manager, 将大部分 Effects 特效关闭
4. 将 /tmp 放去内存
$ sudo gedit /etc/fstab
tmpfs /tmp tmpfs size=2G,defaults,noatime,mode=1777 0 0
* OpenSUSE 已有了, 但用的是 btrfs 格式
5. 磁盘整理
$ sudo e4defrag -c ~/
$ sudo e4defrag -v ~/
* OpenSUSE 用的是 btrfs / xfs 格式, 所以以上方法不能用
6. 关闭拖慢速度的开机服务
http://jasonmun.blogspot.com/2017/03/systemd-analyze-blame.html
Ubuntu - 速度优化
http://jasonmun.blogspot.my/2017/03/ubuntu-speed.html
Ubuntu 也行, 相信其它 Linux 版本也可以用
1. 调整 Swappiness 设置
# 查看系统中的 swappiness (预设为 60)
$ cat /proc/sys/vm/swappiness
# 修改 swappiness 值为 10 (即偏向使用物理内存)
$ sudo sysctl vm.swappiness=10
# 以下也要设置, 不然重启后无效
$ sudo gedit /etc/sysctl.conf
或
$ sudo gedit /etc/sysctl.d/99-sysctl.conf
vm.swappiness=10
重启
2. Preload - 可预读取, 会将经常读取的东西先加载,
开启软件的速度会变快
$ sudo dnf install preload
* OpenSUSE 软件库没有 preload
3. 关闭所有 Effects 特效
$ sudo dnf install compiz ccsm
* OpenSUSE 用 sudo zypper install compiz simple-ccsm
打开 CompizConfig Settings Manager, 将大部分 Effects 特效关闭
4. 将 /tmp 放去内存
$ sudo gedit /etc/fstab
tmpfs /tmp tmpfs size=2G,defaults,noatime,mode=1777 0 0
* OpenSUSE 已有了, 但用的是 btrfs 格式
5. 磁盘整理
$ sudo e4defrag -c ~/
$ sudo e4defrag -v ~/
* OpenSUSE 用的是 btrfs / xfs 格式, 所以以上方法不能用
6. 关闭拖慢速度的开机服务
http://jasonmun.blogspot.com/2017/03/systemd-analyze-blame.html
Ubuntu - 速度优化
http://jasonmun.blogspot.my/2017/03/ubuntu-speed.html
2017年3月9日星期四
RedHat / CentOS - 修改 root 密码

rd.break 方法
1. 在启动界面, 内核名称上按 "e"
2. 进入编辑后, 找到 linux16 开头处, 按 "end" 键, 到最后处输入 rd.break
3. 按 Ctrl+x, 进入 shell 输入
$ mount -o remount,rw /sysroot/
$ chroot /sysroot/
4. 输入 echo redhat|passwd --stdin root
修改 root 密码为 redhat, 或输入 passwd
5. 输入 touch /.autorelabel 让 selinux 生效
6. 按 Ctrl+d 退出, 后 reboot
init 方法
1. 在启动界面, 内核名称上按 "e"
2. 进入编辑后, 找到 linux16/linux/linuxefi 所在参数行尾添加内容: init=/bin/sh
3. 按 Ctrl+x, 进入 shell 输入
$ mount -o remount,rw /
4. 输入 passwd
5. 输入 touch /.autorelabel
6. 输入 exec /sbin/init 来正常启动, 或 exec /sbin/reboot 重启
2017年3月1日星期三
Fedora - 网易云音乐
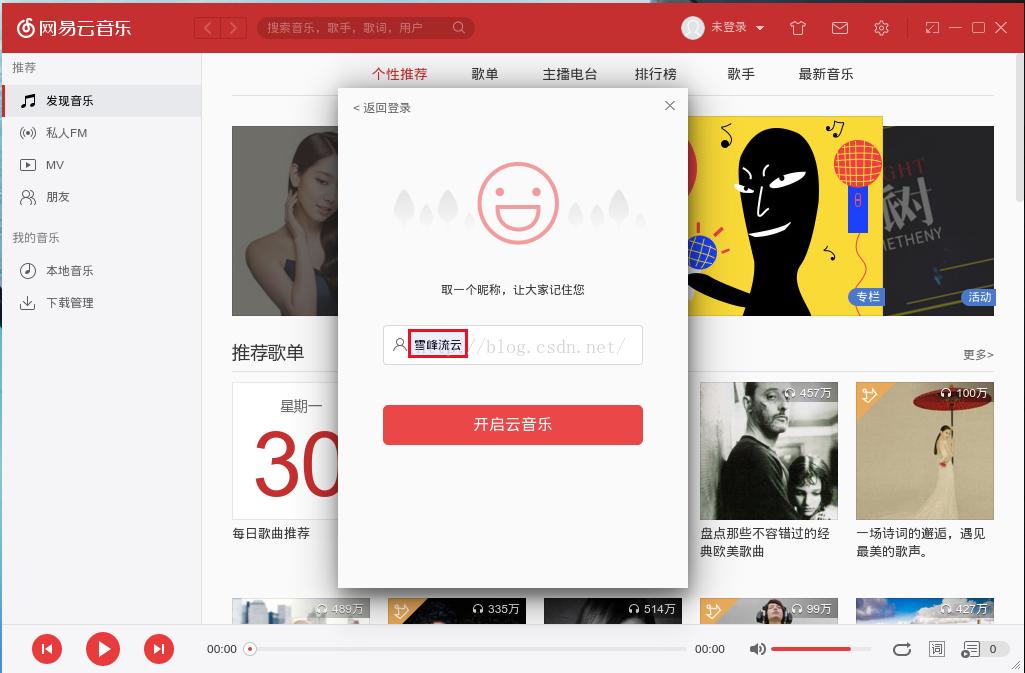
http://music.163.com/#/download
1. 下载与解压
$ cd ~/Downloads
$ wget http://s1.music.126.net/download/pc/netease-cloud-music_1.0.0_amd64_ubuntu16.04.deb
$ su
$ ar x netease-cloud-music_*.deb
$ tar -Jxvf data.tar.xz -C /
2. 创建库链接配置文件
$ echo '/usr/lib/netease-cloud-music' > /etc/ld.so.conf.d/netease-cloud-music-64.conf
$ ldconfig
3. 安装缺少的依赖库
$ dnf install libXScrnSaver-devel
$ dnf groupinstall "C Development Tools and Libraries" -y
$ dnf install qt5-qtmultimedia libcue taglib qt5-{qtx11extras,qtbase{,-gui,-common}} libva-vdpau-driver
4. 运行
$ su username
$ netease-cloud-music
5. 其它: 查看与安装缺少的依赖库
$ su
$ ldd `which netease-cloud-music` | grep not
$ dnf provides '*/libxxxx.so'
$ dnf install yyyy
Ubuntu 版
http://jasonmun.blogspot.my/2017/03/ubuntu-netease.htmlOpenSUSE 版
http://jasonmun.blogspot.my/2017/03/opensuse-netease.html
2017年2月22日星期三
Linux - cockpit 服务管理工具

$ su
1. 安装
$ yum install cockpit
2. 启动
$ systemctl start cockpit
$ systemctl enable cockpit
3. 打开防火壁端口
$ firewall-cmd --get-active-zones
$ firewall-cmd --add-service=cockpit --permanent --zone=public
$ firewall-cmd --reload
$ firewall-cmd --list-all --zone=public
4. 浏览
http://127.0.0.1:9090
2017年1月28日星期六
CentOS / Fedora - Network Settings - 静态 IP 设置

$ su
$ ls /etc/sysconfig/network-scripts/ifcfg-*
$ gedit /etc/sysconfig/network-scripts/ifcfg-ens33
CentOS
TYPE=Ethernet
BOOTPROTO=none
DEFROUTE=yes
IPV4_FAILURE_FATAL=no
IPV6INIT=yes
IPV6_AUTOCONF=yes
IPV6_DEFROUTE=yes
IPV6_FAILURE_FATAL=no
IPV6_ADDR_GEN_MODE=stable-privacy
NAME=ens33
UUID=316b162a-238a-444b-95d9-d81685570a23
DEVICE=ens33
ONBOOT=yes
IPADDR=192.168.0.100
PREFIX=24
GATEWAY=192.168.0.1
IPV6_PEERDNS=yes
IPV6_PEERROUTES=yes
Fedora
HWADDR=00:0C:29:EF:99:2B
TYPE=Ethernet
BOOTPROTO=none
DEFROUTE=yes
IPV4_FAILURE_FATAL=no
IPV6INIT=no
IPV6_AUTOCONF=yes
IPV6_DEFROUTE=yes
IPV6_FAILURE_FATAL=no
IPV6_ADDR_GEN_MODE=stable-privacy
NAME=ens33
UUID=79df6744-2e48-3bc6-b1e3-a86e2fc03924
ONBOOT=yes
AUTOCONNECT_PRIORITY=-999
ZONE=home
MACADDR=00:0C:29:EF:99:2B
IPV6_PEERDNS=yes
IPV6_PEERROUTES=yes
DNS1=192.168.0.1
IPADDR=192.168.0.100
PREFIX=24
GATEWAY=192.168.0.1
$ systemctl restart network
2017年1月2日星期一
CentOS / Fedora - postfix - 解决 SELINUX 问题
由于 SELINUX 会阻挡掉 SMTP, 所以需要增加 policy,
以让 SMTP 服务通过
另一个方法也可以选择将 SELINUX 关掉
$ gedit /etc/sysconfig/selinux
SELINUX=disabled
1. 创建文件
$ su
$ gedit postfix-local.te
module postfix-local 1.0;
require {
type tmpfs_t;
type sendmail_t;
type postfix_local_t;
type postfix_cleanup_t;
type postfix_smtp_t;
type postfix_smtpd_t;
type postfix_qmgr_t;
type postfix_master_t;
type postfix_pickup_t;
class lnk_file read;
}
allow sendmail_t tmpfs_t:lnk_file read;
allow postfix_local_t tmpfs_t:lnk_file read;
allow postfix_cleanup_t tmpfs_t:lnk_file read;
allow postfix_smtp_t tmpfs_t:lnk_file read;
allow postfix_smtpd_t tmpfs_t:lnk_file read;
allow postfix_pickup_t tmpfs_t:lnk_file read;
allow postfix_master_t tmpfs_t:lnk_file read;
allow postfix_qmgr_t tmpfs_t:lnk_file read;
2. 运行
$ checkmodule -m -M -o postfix-local.mod postfix-local.te
$ semodule_package --outfile postfix-local.pp --module postfix-local.mod
$ semodule -i postfix-local.pp
以让 SMTP 服务通过
另一个方法也可以选择将 SELINUX 关掉
$ gedit /etc/sysconfig/selinux
SELINUX=disabled
1. 创建文件
$ su
$ gedit postfix-local.te
module postfix-local 1.0;
require {
type tmpfs_t;
type sendmail_t;
type postfix_local_t;
type postfix_cleanup_t;
type postfix_smtp_t;
type postfix_smtpd_t;
type postfix_qmgr_t;
type postfix_master_t;
type postfix_pickup_t;
class lnk_file read;
}
allow sendmail_t tmpfs_t:lnk_file read;
allow postfix_local_t tmpfs_t:lnk_file read;
allow postfix_cleanup_t tmpfs_t:lnk_file read;
allow postfix_smtp_t tmpfs_t:lnk_file read;
allow postfix_smtpd_t tmpfs_t:lnk_file read;
allow postfix_pickup_t tmpfs_t:lnk_file read;
allow postfix_master_t tmpfs_t:lnk_file read;
allow postfix_qmgr_t tmpfs_t:lnk_file read;
2. 运行
$ checkmodule -m -M -o postfix-local.mod postfix-local.te
$ semodule_package --outfile postfix-local.pp --module postfix-local.mod
$ semodule -i postfix-local.pp
2016年11月28日星期一
Fedora 25 - desktop 中的图标无法显示
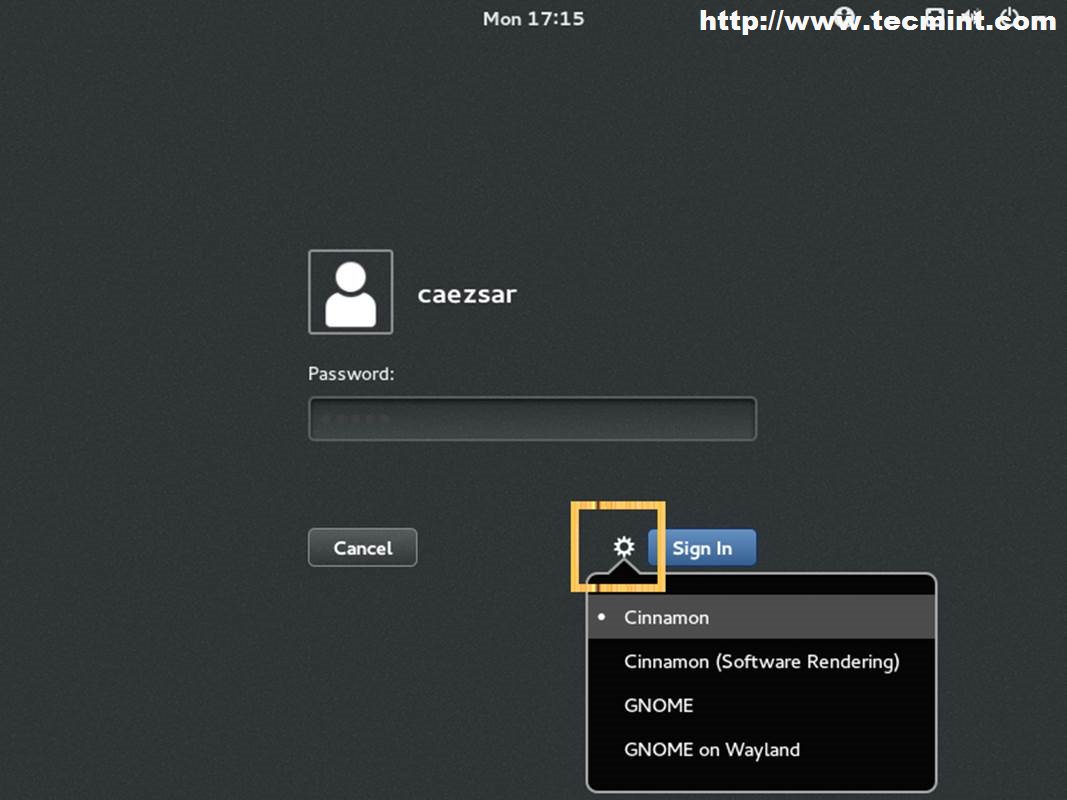
Fedora 25 由于预设用的是 GNOME on Wayland, 但不支持 Desktop 图标.
所以只要在登入时选择为 GNOME on Xorg, 就没这个问题.
2016年6月30日星期四
2016年5月15日星期日
Fedora - SSH 安装
$ su
# 安装
$ dnf install openssh-server
# 设置
$ vi /etc/ssh/sshd_config
# 启动服务
$ service sshd start
# 自动开机启动
$ systemctl enable sshd
$ systemctl start sshd
另外
$ systemctl restart sshd # 重启
$ systemctl status sshd # 查看状态
# 安装
$ dnf install openssh-server
# 设置
$ vi /etc/ssh/sshd_config
# 启动服务
$ service sshd start
# 自动开机启动
$ systemctl enable sshd
$ systemctl start sshd
另外
$ systemctl restart sshd # 重启
$ systemctl status sshd # 查看状态
2016年5月14日星期六
Fedora 23 - BCloud - error: Failed to get bdstoken

https://github.com/LiuLang/bcloud-packages/raw/master/bcloud-3.5.10-1.fc21.noarch.rpm
去官网下载最新软件包 bcloud-3.5.10-1.fc21.noarch.rpm
(除了 ubuntu 的 deb 安装版本外, 应该也有同样的问题,
因看日期, 作者好久都没更新了),
登入时会出现 error: Failed to get bdstoken
解决方法
$ su
$ gedit /usr/lib/python3.4/site-packages/bcloud/auth.py
(安装在不同 Linux 版本, 路径应有点不同)
将以下这行
bds_re = re.compile('BDSTOKEN\s*=\s*"([^"]+)"')
改为
bds_re = re.compile('"bdstoken"\s*:\s*"([^"]+)"', re.IGNORECASE)
即可
https://github.com/LiuLang/bcloud/pull/214/files
如果还有问题, 那就要去确认已将所有依赖软件包安装了
$ dnf install gtk3 gtk3-devel
$ dnf install python3-crypto python3-dbus python3-inotify python3-keyring
$ dnf install python3-cssselect python3-gobject python3-gobject-base python3-lxml
$ dnf install gnome-icon-theme-symbolic gnome-keyring libgnome-keyring
$ dnf install libnotify notification-daemon
2016年5月8日星期日
Fedora - 增加压缩格式
给 Fedora 系统增加些压缩格式
$ dnf install cabextract p7zip p7zip-plugins zip gzip unzip lrzip arc arj unarj cpio file freeze pax tnef bzip2 lzip lzop ncompress nomarch unzix
# unrar 在 rpmfusion.org / russianfedora 有提供
$ su -c 'dnf install http://download1.rpmfusion.org/free/fedora/rpmfusion-free-release-$(rpm -E %fedora).noarch.rpm http://download1.rpmfusion.org/nonfree/fedora/rpmfusion-nonfree-release-$(rpm -E %fedora).noarch.rpm'
$ su
$ dnf install http://mirror.yandex.ru/fedora/russianfedora/russianfedora/free/fedora/russianfedora-free-release-stable.noarch.rpm
$ dnf install http://mirror.yandex.ru/fedora/russianfedora/russianfedora/nonfree/fedora/russianfedora-nonfree-release-stable.noarch.rpm
$ dnf install unrar
$ dnf install cabextract p7zip p7zip-plugins zip gzip unzip lrzip arc arj unarj cpio file freeze pax tnef bzip2 lzip lzop ncompress nomarch unzix
# unrar 在 rpmfusion.org / russianfedora 有提供
$ su -c 'dnf install http://download1.rpmfusion.org/free/fedora/rpmfusion-free-release-$(rpm -E %fedora).noarch.rpm http://download1.rpmfusion.org/nonfree/fedora/rpmfusion-nonfree-release-$(rpm -E %fedora).noarch.rpm'
$ su
$ dnf install http://mirror.yandex.ru/fedora/russianfedora/russianfedora/free/fedora/russianfedora-free-release-stable.noarch.rpm
$ dnf install http://mirror.yandex.ru/fedora/russianfedora/russianfedora/nonfree/fedora/russianfedora-nonfree-release-stable.noarch.rpm
$ dnf install unrar
2016年5月7日星期六
Fedora - Ibus x Fcitx 切换
Fedora - Ibus 转 Fcitx + 搜狗拼音
http://jasonmun.blogspot.my/2016/05/fedora-ibus-fcitx-sogoupinyin.html
转换 fcitx >> ibus
$ su root
$ setfacl -m u:用户名:rwx /usr/bin/ibus-daemon
$ pkill fcitx
$ pkill sogou-qimpanel
$ mv /etc/xdg/autostart/fcitx-ui-sogou-qimpanel.desktop /home/用户名/fcitx-ui-sogou-qimpanel.desktop
$ alternatives --config xinputrc # 选 ibus
或
$ alternatives --set xinputrc /etc/X11/xinit/xinput.d/ibus.conf
$ su 用户名
$ gsettings set org.gnome.settings-daemon.plugins.keyboard active false
$ imsettings-switch ibus
转换 ibus >> fcitx
$ su root
$ setfacl -m u:用户名:rw /usr/bin/ibus-daemon
$ pkill ibus-daemon
$ mv /home/用户名/fcitx-ui-sogou-qimpanel.desktop /etc/xdg/autostart/fcitx-ui-sogou-qimpanel.desktop
$ alternatives --config xinputrc # 选 fcitx
或
$ alternatives --set xinputrc /etc/X11/xinit/xinput.d/fcitx.conf
$ su 用户名
$ gsettings set org.gnome.settings-daemon.plugins.keyboard active false
$ imsettings-switch fcitx
$ sogou-qimpanel
http://jasonmun.blogspot.my/2016/05/fedora-ibus-fcitx-sogoupinyin.html
转换 fcitx >> ibus
$ su root
$ setfacl -m u:用户名:rwx /usr/bin/ibus-daemon
$ pkill fcitx
$ pkill sogou-qimpanel
$ mv /etc/xdg/autostart/fcitx-ui-sogou-qimpanel.desktop /home/用户名/fcitx-ui-sogou-qimpanel.desktop
$ alternatives --config xinputrc # 选 ibus
或
$ alternatives --set xinputrc /etc/X11/xinit/xinput.d/ibus.conf
$ su 用户名
$ gsettings set org.gnome.settings-daemon.plugins.keyboard active false
$ imsettings-switch ibus
转换 ibus >> fcitx
$ su root
$ setfacl -m u:用户名:rw /usr/bin/ibus-daemon
$ pkill ibus-daemon
$ mv /home/用户名/fcitx-ui-sogou-qimpanel.desktop /etc/xdg/autostart/fcitx-ui-sogou-qimpanel.desktop
$ alternatives --config xinputrc # 选 fcitx
或
$ alternatives --set xinputrc /etc/X11/xinit/xinput.d/fcitx.conf
$ su 用户名
$ gsettings set org.gnome.settings-daemon.plugins.keyboard active false
$ imsettings-switch fcitx
$ sogou-qimpanel
Fedora 23 - Gnome Tweak Tool
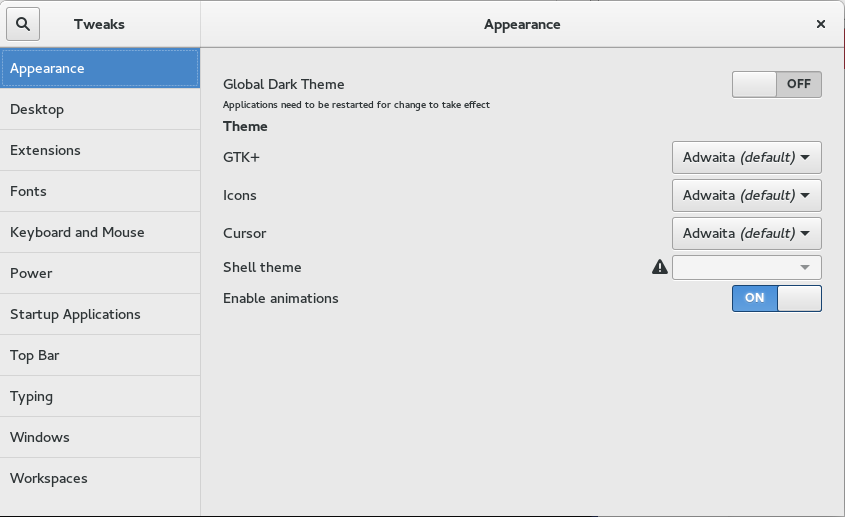
在 Fedora 的 Software 软件下载处有时会安装不了, 但又没有错误显示
因缺乏其它的依赖包, 所以直接用命令安装较为实际
$ su
$ dnf install gnome-tweak-tool
* 必须用 python 2.7 运行
2016年5月6日星期五
g++: error: /usr/lib/rpm/redhat/redhat-hardened-cc1: No such file or directory
g++: error: /usr/lib/rpm/redhat/redhat-hardened-cc1: No such file or directory
如果出现以上错误, 解决方法是
$ dnf install redhat-rpm-config
如果出现以上错误, 解决方法是
$ dnf install redhat-rpm-config
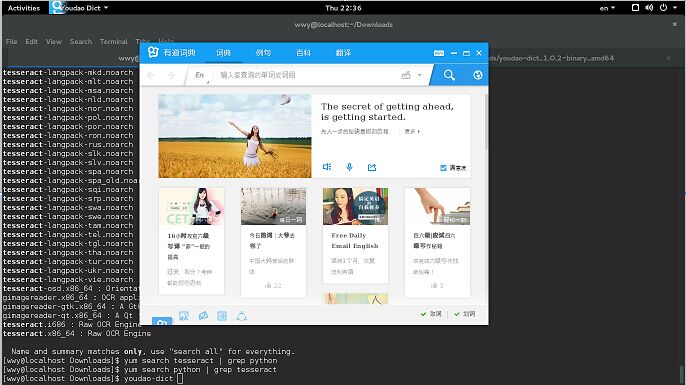
Fedora 23 - 有道词典
http://rpmfusion.org/Configuration
$ su -c 'dnf install http://download1.rpmfusion.org/free/fedora/rpmfusion-free-release-$(rpm -E %fedora).noarch.rpm http://download1.rpmfusion.org/nonfree/fedora/rpmfusion-nonfree-release-$(rpm -E %fedora).noarch.rpm'
2. 下载与解压
http://cidian.youdao.com/index-linux.html
http://codown.youdao.com/cidian/linux/youdao-dict_1.1.0-0~amd64.tar.gz
http://codown.youdao.com/cidian/linux/youdao-dict_1.1.0-0~i386.tar.gz
$ cd ~/Downloads
$ wget http://codown.youdao.com/cidian/linux/youdao-dict_1.1.0-0~amd64.tar.gz
$ mkdir youdao
$ mv youdao-dict_1.1.0-0~amd64.tar.gz youdao
$ cd youdao
$ tar zxvf youdao-dict_1.1.0-0~amd64.tar.gz
3. 修改源码 (不改也行, 没影响)
$ gedit ~/Downloads/youdao/src/dae/daeclient.py
第 31 行:
from PyQt5.Qt import QApplication
改为
from PyQt5.QtWidgets import QApplication
这会安装到 /usr/share/youdao-dict/dae/daeclient.py
4. 安装依赖软件包
$ su
$ dnf install python python3
$ dnf install python-xlib
$ dnf install python3-pip -y
$ pip3 install --upgrade pip
$ pip3 install python3-xlib
$ dnf install python3-requests python3-lxml python3-pillow python3-qt5 python3-qt5-devel
$ dnf install tesseract-langpack-chi_sim tesseract-langpack-chi_tra tesseract-langpack-enm tesseract-devel
$ dnf install qt5-qtgraphicaleffects qt5-qtquickcontrols
5. 安装 youdao
$ su
$ cd ~/Downloads/youdao
$ chmod +x install.sh
$ sh ./install.sh
6. python3-qt5 和 qt5-qtbase 降级到 5.5
$ dnf downgrade python3-qt5-devel --allowerasing
$ dnf downgrade qt5-qtbase-devel --allowerasing
$ dnf list installed | grep python3-qt5
python3-qt5.x86_64 5.5-1.fc23 @fedora
python3-qt5-devel.x86_64 5.5-1.fc23 @fedora
$ dnf list installed | grep qt5-qtbase
qt5-qtbase.x86_64 5.5.0-18.fc23 @fedora
qt5-qtbase-common.noarch 5.5.0-18.fc23 @fedora
qt5-qtbase-devel.x86_64 5.5.0-18.fc23 @fedora
qt5-qtbase-gui.x86_64 5.5.0-18.fc23 @fedora
7. 重启后运行 (不要用 root 户口)
$ youdao-dict
订阅:
博文 (Atom)