1.源码安装
# http://nodejs.org/dist/latest
$ wget https://nodejs.org/dist/v6.11.4/node-v6.11.4.tar.gz
$ tar zxvf node-v* && cd node-v*
$ su
$ yum install gcc gcc-c++
$ ./configure
$ make
$ make install
$ node --version
# 卸载
$ make uninstall
2.已编译版本安装
$ cd ~
$ wget https://nodejs.org/dist/v6.11.4/node-v6.11.4-linux-x64.tar.xz
$ su
$ tar --strip-components=1 -Jxvf node-v* -C /usr/local
$ node --version
3.EPEL安装
$ su
$ yum install http://dl.fedoraproject.org/pub/epel/epel-release-latest-7.noarch.rpm
$ yum install nodejs
$ node --version
# (可选) 安装npm管理包
$ yum install npm
4.通过NVM安装
# https://github.com/creationix/nvm
$ curl https://raw.githubusercontent.com/creationix/nvm/v0.33.0/install.sh | bash
$ source ~/.bashrc
# 列出所需要的版本
$ nvm list-remote
# 安装相应的版本
$ nvm install v0.10.30
# 查看已安装的版本
$ nvm list
# 切换版本
$ nvm use v0.10.30
# 设置默认版本
$ nvm alias default v0.10.30
2016年7月31日星期日

Cygwin + GNU (gcc / g++ / gdb)
1.安装 Cygwin 的时候, 也选择安装上 gcc
gcc-ada: GNU Compiler Collection (Ada)
gcc-cilkplus: GNU Compiler Collection (Cilk Plus)
gcc-core: GNU Compiler Collection (C, OpenMP)
gcc-fortran: GNU Compiler Collection (Fortran)
gcc-g++: GNU Compiler Collection (C++)
gcc-objc: GNU Compiler Collection (Objective-C)
gcc-objc++: GNU Compiler Collection (Objective-C++)
gdb: The GNU Debugger
https://www.cygwin.com/setup-x86_64.exe
2. 安装后测试
$ gcc --version
$ g++ --vesion
$ gdb --version
3. 存成 test.cpp, 放在 cygwin64/home/用户名
#include <stdio.h>
int main() {
printf("Hello World!");
return 0;
}
4. 编译 CPP
$ g++ test.cpp -o test
5. 运行 test.exe
$ ./test
Hello World!
gcc-ada: GNU Compiler Collection (Ada)
gcc-cilkplus: GNU Compiler Collection (Cilk Plus)
gcc-core: GNU Compiler Collection (C, OpenMP)
gcc-fortran: GNU Compiler Collection (Fortran)
gcc-g++: GNU Compiler Collection (C++)
gcc-objc: GNU Compiler Collection (Objective-C)
gcc-objc++: GNU Compiler Collection (Objective-C++)
gdb: The GNU Debugger
https://www.cygwin.com/setup-x86_64.exe
2. 安装后测试
$ gcc --version
$ g++ --vesion
$ gdb --version
3. 存成 test.cpp, 放在 cygwin64/home/用户名
#include <stdio.h>
int main() {
printf("Hello World!");
return 0;
}
4. 编译 CPP
$ g++ test.cpp -o test
5. 运行 test.exe
$ ./test
Hello World!
Cygwin + SSH
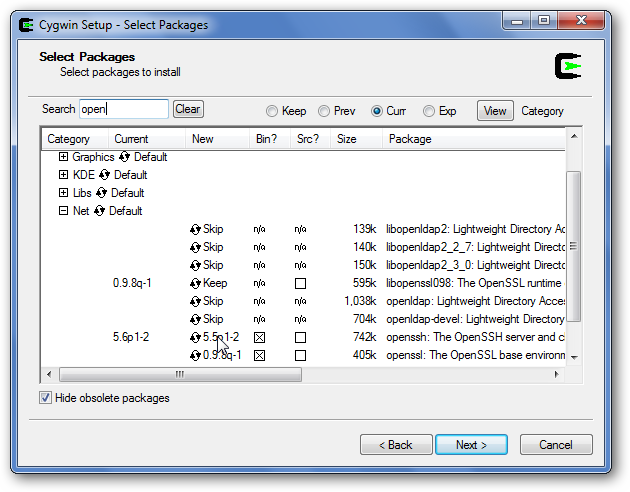


https://www.cygwin.com/setup-x86_64.exe
2.设置
$ ssh-host-config
基本上都是写 yes, 除了以下
*** Query: Enter the value of CYGWIN for the daemon: [] ntsec
*** Query: Do you want to use a different name? (yes/no) no
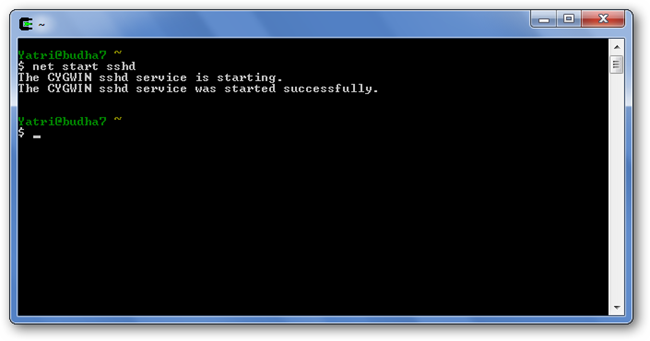
# 开启 sshd 服务
$ net start sshd
$ ssh-user-config
*** Query: Shall I create an SSH1 RSA identity file for you? (yes/no) no (因会选用 SSH2)
3.让防火壁允许 sshd 服务
Windows Firewall - Allow a program or feature through Windows Firewall
- 选择 C:\cygwin64\usr\sbin\sshd.exe
4.用 SSH 连接 Cygwin
$ ssh –v 用户名@localhost
5.关闭 sshd 服务, 要用的时候才开启
$ net stop sshd
订阅:
博文 (Atom)